If you want to add a cookie banner to your WordPress website and comply with privacy laws like GDPR, CCPA, and other cookie regulations, CookieYes is one of the most popular cookie consent plugins available.
To install CookieYes on WordPress, follow these steps:
-
Create your CookieYes account
-
Install the CookieYes WordPress plugin
-
Connect the plugin to your account
-
Scan your website for cookies
-
Review detected cookies
-
Test that your banner works
Step 1 – Create Your CookieYes Account
Before installing the WordPress plugin, you need to create a CookieYes account.
Go to the CookieYes website and click the “Get Started Free” button in the top right corner.
👉 View CookieYes pricing and create your account
Then complete the registration:
-
Enter your email address
-
Add your website domain
-
Create your account
Most small WordPress websites can start with the Free plan, which supports up to 5,000 monthly visitors.
If your website receives more traffic or uses advanced tracking tools, you can start with the 14-day Pro trial and downgrade later if needed.
After your account is created, you’ll be taken to the CookieYes dashboard where you can start configuring your cookie banner.
Now that your account is ready, let’s install the plugin on your WordPress website.
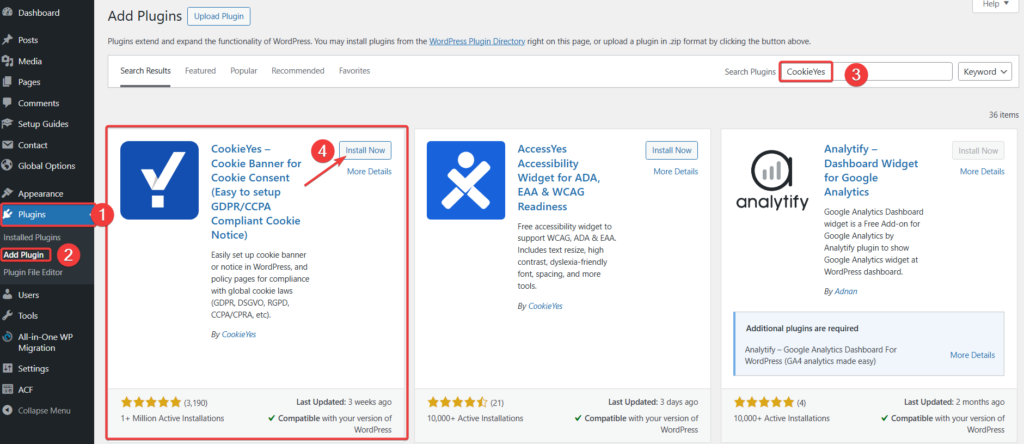
Step 2 – Install the CookieYes WordPress Plugin
Now install the official CookieYes plugin on your WordPress website.
-
Go to Plugins → Add New
-
Search for CookieYes
-
Click the “Install Now” button
-
Click the “Activate” button
After activation, you’ll see CookieYes in your WordPress admin menu.
Step 3 – Connect the WordPress Plugin to Your CookieYes Account
After installing and activating the plugin, open:
WordPress → CookieYes → Dashboard
You should now see something like this:

On the CookieYes dashboard, click “Connect to an existing account”.
After clicking Connect to an existing account inside the WordPress plugin, you’ll be redirected to a confirmation screen.
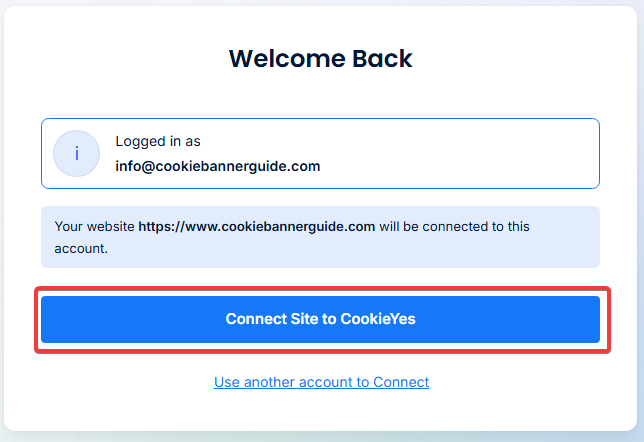
You’ll see:
-
Your logged-in email address
-
The website domain that will be connected
-
A confirmation button
To complete the connection, click “Connect Site to CookieYes”.
What Happens After You Click “Connect Site”?
Once confirmed:
-
Your WordPress site connects to your CookieYes account
-
Banner settings sync automatically
-
Advanced plan features activate (if you’re on a paid plan)
-
Cookie scanning becomes available
-
Consent logs are stored securely in the cloud
You’ll then be redirected back to your WordPress dashboard.
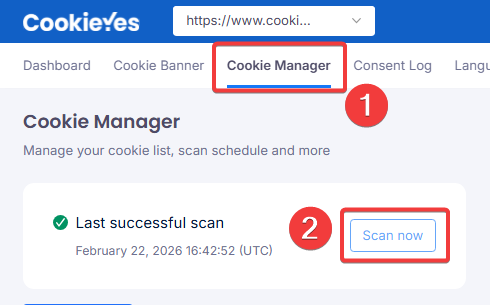
Step 4 – Scan Your Website for Cookies
After connecting, go to: CookieYes → Cookie Manager or directly to your Web App dashboard.
Then click the “Scan now” button.
Cookie scanning is important because privacy laws such as GDPR and CCPA require websites to identify and categorize cookies before showing a consent banner.
The scan will:
-
Detect cookies
-
Identify trackers
-
Automatically categorize cookies
-
Generate a cookie declaration
This usually takes a few minutes.
Step 5 – Review and Adjust Detected Cookies
After the scan completes, CookieYes will display a list of detected cookies and trackers.
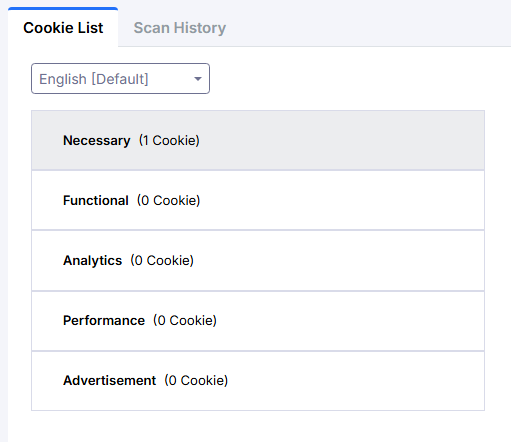
You’ll see details such as:
-
Cookie name
-
Provider (e.g., Google, Meta, Stripe)
-
Duration (expiry time)
-
Type (first-party or third-party)
-
Assigned category
Most cookies are automatically categorized into:
-
Necessary
- Functional
-
Analytics
-
Performance
-
Advertisement
The Scan Is Not Perfect. Automatic cookie scanners cannot detect every cookie perfectly, so manual review is always recommended.
That’s why you should always:
✔ Check if any cookies are marked as Uncategorized
✔ Verify that analytics cookies are not placed under “Necessary”
✔ Confirm marketing scripts are properly labeled
GDPR requires accurate classification. If categories are wrong, your consent setup may not be compliant.
Edit Cookie Categories If Needed
If something looks incorrect:
-
Open the cookie entry.
-
Change its category.
-
Update the description if necessary.
-
Save changes.
This ensures your cookie declaration is accurate and transparent.
What Changes After Review?
Once reviewed and saved:
-
Your banner will block non-essential cookies before consent
-
The “Customize” button will show correct categories
-
Your cookie declaration page will update automatically
If you install new plugins or tracking tools later, remember to run the scan again.
Step 6 – Make Sure Your Banner Works
Before considering the setup complete:
-
Open your website in Incognito mode.
-
On your website, click the “Reject All” button.
-
Refresh the page.
-
Make sure analytics and marketing cookies do not load.
-
Then click the “Accept All” button and verify that tracking activates correctly.
- (Optional) Open Developer Tools → Application → Cookies to verify that no non-essential cookies are stored before consent.
If everything works correctly, your setup is complete.
Summary
Installing CookieYes on WordPress is straightforward when you follow the setup steps carefully. Once installed, your cookie banner can block non-essential cookies and help your website comply with privacy regulations like GDPR, CCPA, and other cookie laws.
In this guide, you learned how to:
-
Choose the right CookieYes plan
-
Create and activate your account
-
Configure your banner template
-
Install the official WordPress plugin
-
Connect your site to CookieYes
-
Run a cookie scan
-
Verify that your banner works correctly
Your WordPress cookie banner should now be live and correctly configured for privacy compliance.
What to Do Next
Now that CookieYes is installed, the next step is to optimize your setup and test that your banner works correctly.

Frequently Asked Questions
Common questions about this topic
Yes, CookieYes offers a free plan for small websites. If your website has low traffic and basic cookie consent needs, the free plan is often enough to get started.
CookieYes can automatically block non-essential cookies, but you should always review the detected cookie categories manually. Automatic scans are helpful, but they are not always perfect.
Yes, scanning your website is an important step. It helps CookieYes detect cookies and trackers so you can review, categorize, and manage them correctly in your banner settings.
CookieYes can help websites meet privacy requirements such as GDPR by blocking non-essential cookies before consent and providing banner customization options. However, you should still review your setup carefully to make sure your website is configured correctly.
Yes, CookieYes supports Google Consent Mode v2 on supported plans. This can help websites manage consent signals for Google services, but you should always test your setup after enabling it.
The best way is to test your website in Incognito mode. Reject cookies first, refresh the page, and check that analytics or marketing cookies do not load before consent.