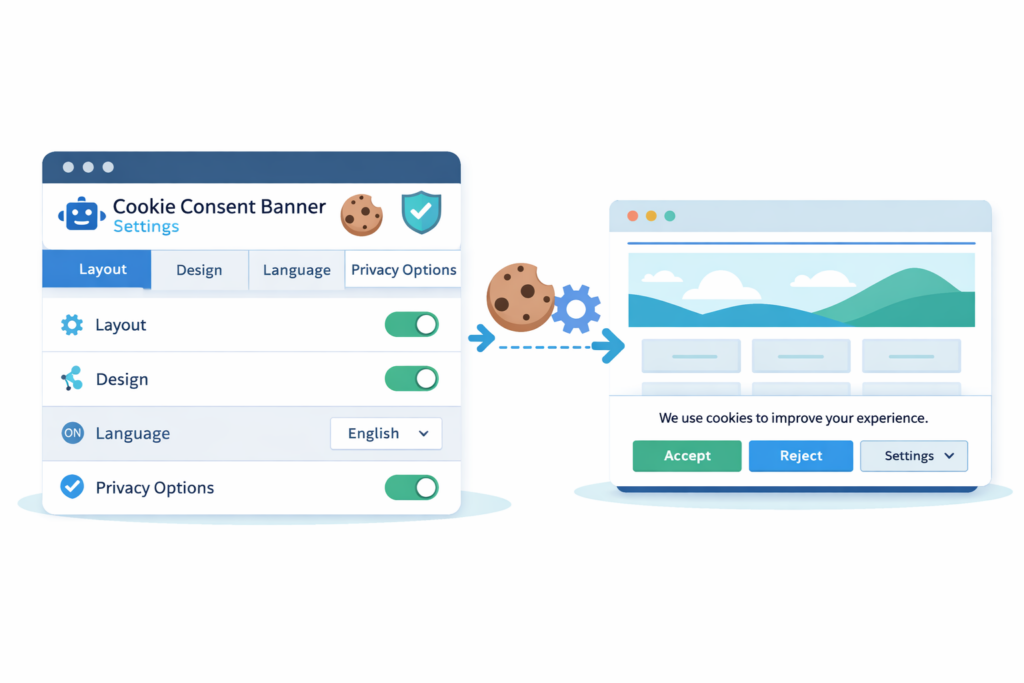
Cookiebot allows you to customize how your cookie consent banner appears and behaves on your website.
You can change the layout, design, text, language settings, and privacy options directly in the Cookiebot dashboard.
In this guide, you’ll learn how to configure the Cookiebot cookie banner step by step so you can control how consent is displayed and managed on your website.
If you haven’t installed Cookiebot yet, follow our guide on how to install Cookiebot on WordPress.
To configure the Cookiebot cookie banner:
• open the Cookiebot configuration dashboard
• choose the banner layout and design
• configure banner text and language settings
• adjust privacy options
Once configured, your cookie banner will appear on your website according to your selected settings.
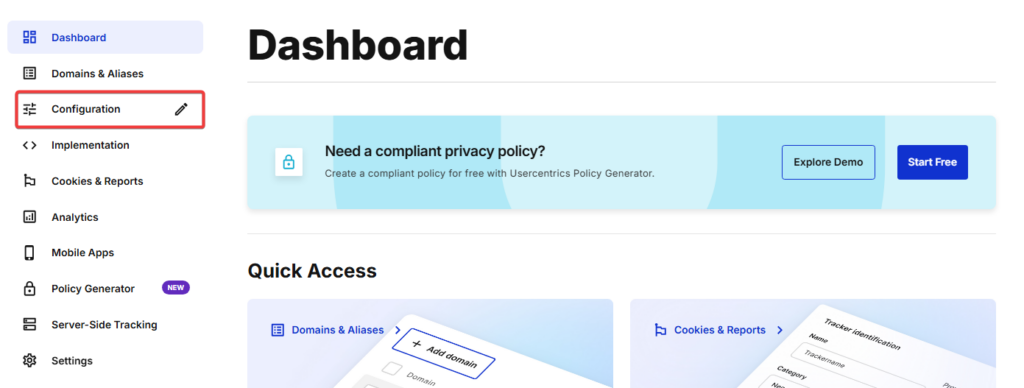
Step 1 — Open Cookiebot Configuration
Log in to your Cookiebot Manager dashboard.
In the left menu, open the Configuration section. This is where you can adjust all settings related to the cookie banner design, content, and privacy options.
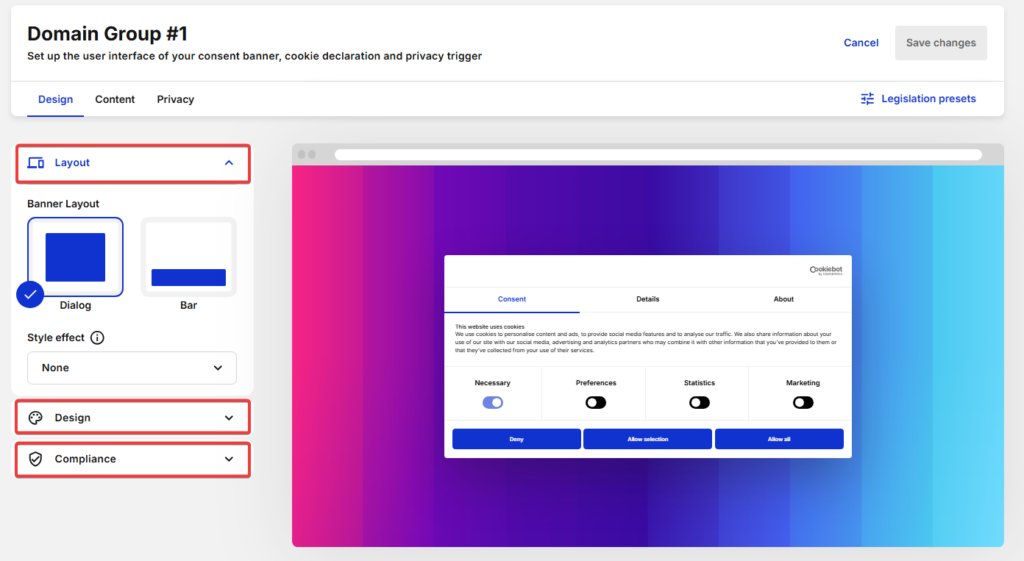
Step 2 — Configure the Banner Layout and Design
In the Configuration section, you will see several settings related to how your cookie banner appears.
Start by opening the Layout section. Here you can choose how the cookie banner is displayed on your website. Cookiebot offers different layout styles, such as a dialog style popup or a banner bar.
Below the layout settings, you can also expand the Design section to customize the visual appearance of the banner.
These settings allow you to adjust elements such as:
• banner style
• visual theme
• overall appearance
The preview panel on the right shows how the banner will look on your website as you change the settings.
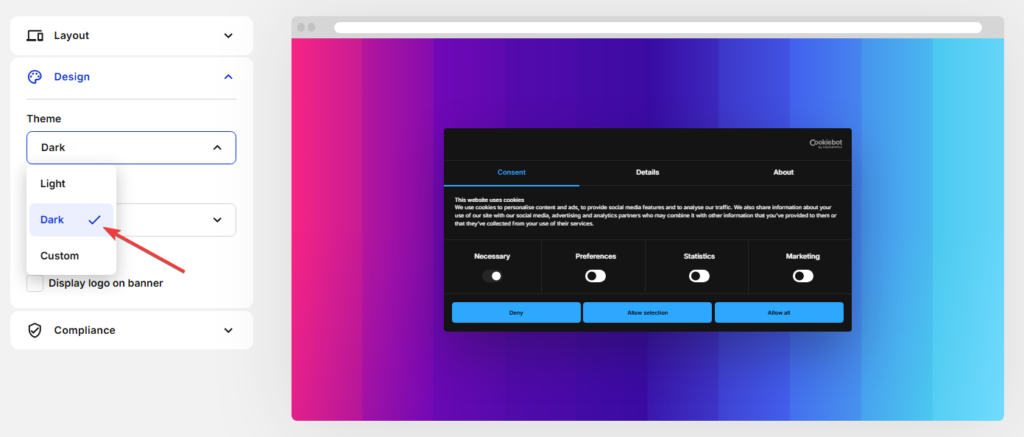
Next, open the Design settings and choose the theme you prefer. Cookiebot provides options such as light and dark themes, or you can customize the banner further using custom styles.
The design changes are immediately visible in the preview window.
Step 3 — Configure the Banner Content
Next, open the Content tab.
Here you can configure the text that appears inside the cookie consent banner, including the heading and the description shown to visitors.

You can also configure the language settings for the banner.
Cookiebot allows you to add multiple languages so the banner can be displayed in the visitor’s preferred language.
For example, you can:
• set a default language
• add additional languages
• enable automatic language detection
When auto-detect language is enabled, Cookiebot will display the cookie banner in the language that matches the visitor’s browser language.
The browser language is the language preference set in the user’s web browser or operating system. Most browsers automatically use the language selected during the device or browser setup.
If someone uses a computer or phone configured in German, their browser language will usually also be German. When they visit your website, Cookiebot detects this language and shows the cookie banner in German.
If another visitor uses English as their browser language, they will see the cookie banner in English.
However, it is important to understand that Cookiebot can only show languages that you have added in the Cookiebot dashboard. If a visitor’s browser language is not available in your Cookiebot settings, the banner will fall back to the default language.
For this reason, you should always add the languages that your website visitors are most likely to use.
Example: How Cookiebot Detects the Visitor Language
| Visitor browser language | Language added in Cookiebot | Banner language shown |
|---|---|---|
| German | German + English | German |
| English | German + English | English |
| Spanish | German + English | English (default) |
| French | French + English | French |
In this example, a Spanish-speaking visitor will see the banner in English because Spanish has not been added to Cookiebot.
Step 4 — Configure Privacy Settings
Next, open the Privacy tab.
This section contains settings related to the privacy trigger, which allows users to reopen the cookie settings after they have already made a choice.
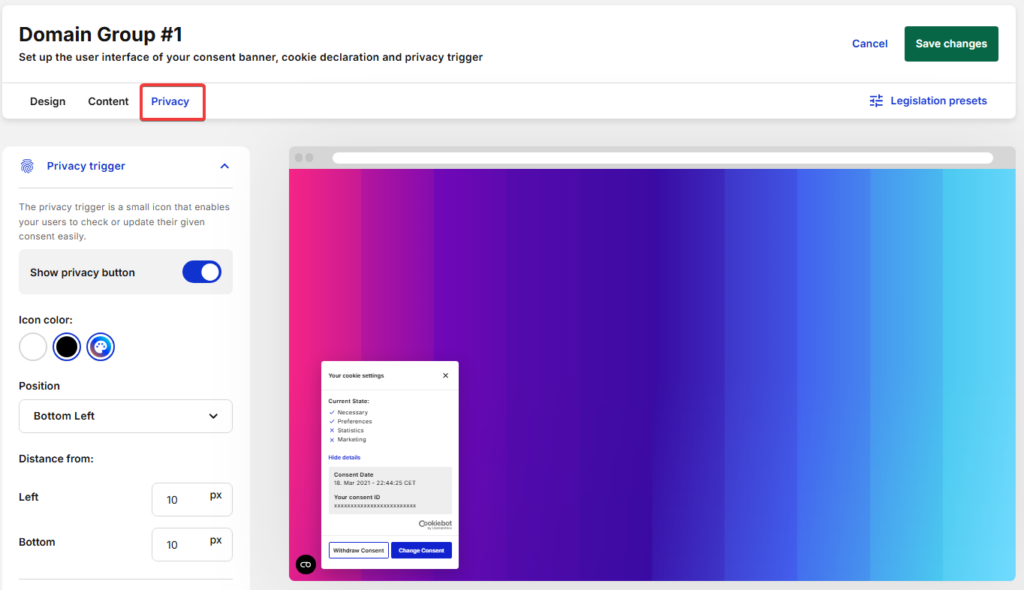
The privacy trigger is typically displayed as a small icon on the website. When users click this icon, they can review or change their cookie consent preferences.
You can configure:
• whether the privacy button is visible
• the icon color
• the position on the page
• spacing from the page edges
This feature is useful because it allows visitors to update their consent choices at any time.
Step 5 — Save Your Configuration
After adjusting the banner layout, content, and privacy settings, make sure to save your configuration.
Click “Save changes” in the top right corner of the screen.

Your cookie banner configuration will now be applied to your website.
Summary
Configuring the Cookiebot cookie banner allows you to control how consent is collected and displayed on your website.
By adjusting the layout, content, language settings, and privacy options, you can create a banner that fits your website design and meets privacy requirements.
What to Do Next
Now that you have configured your Cookiebot banner, the next step is to test that your cookie consent setup works correctly on your website.
You should make sure the banner appears properly, cookie categories behave as expected, and tracking scripts only load after consent.

Frequently Asked Questions
Common questions about this topic
Yes. Cookiebot lets you change the banner layout, theme, colors, and other design settings. You can choose a style that better matches your website while still keeping the banner clear and easy to use.
Yes. Cookiebot supports multiple languages and can display the banner based on the visitor’s browser language. If a matching language is not available, it will use the default language you selected.
The privacy trigger is a small button or icon shown on your website that allows visitors to reopen the cookie settings. This lets users review or change their consent choices after the banner has already been dismissed.