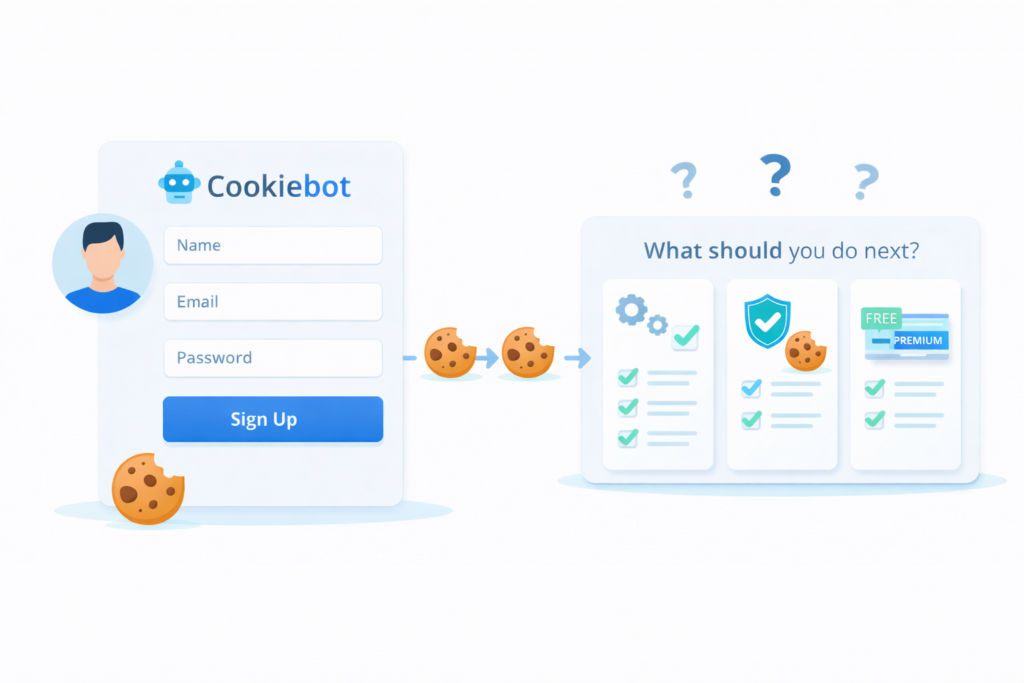
Creating a Cookiebot account is the first step to setting up a compliant cookie consent banner on your website.
In this guide, you’ll learn exactly how to create your Cookiebot account, verify it, and connect your website so you can start managing cookie consent.
If you haven’t installed Cookiebot yet, you can do that later after completing this setup.
If you’re ready to get started, create your free Cookiebot account here.
To create a Cookiebot account and get started:
• Go to the Cookiebot website
• Create your account
• Verify your email
• Add your website domain
• Select a privacy law preset (like GDPR for Europe)
• Start a website scan
Step 1 — Go to the Cookiebot Website
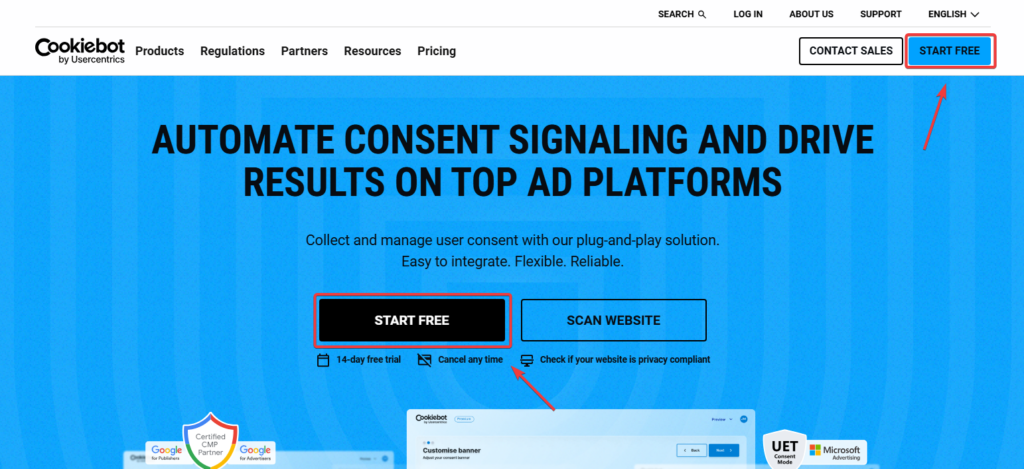
Go to the Cookiebot website and click “Start Free” in the top right corner.
You’ll find this button in the top right corner or in the main section of the homepage.
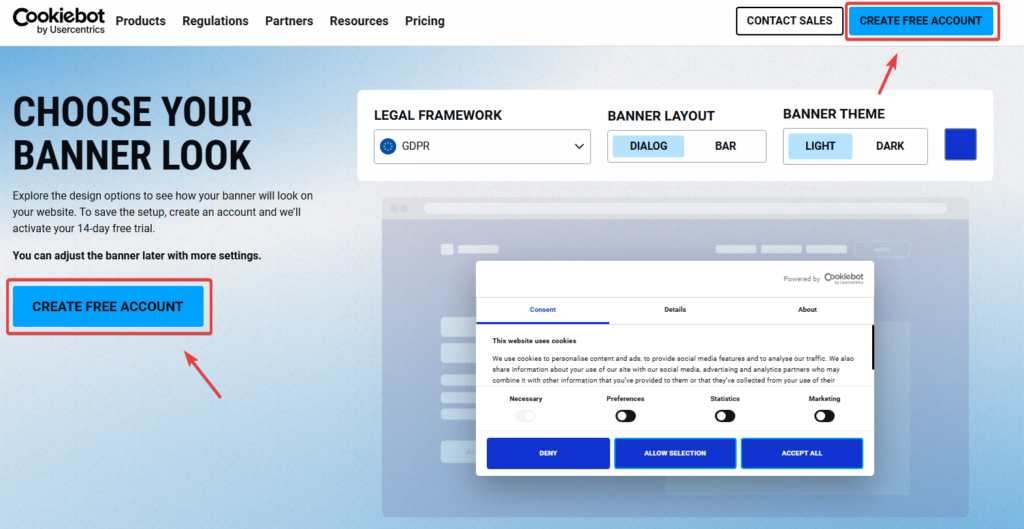
After that on next page click “Create free account” button.
This will take you to the account creation page.
Step 2 — Create Your Account
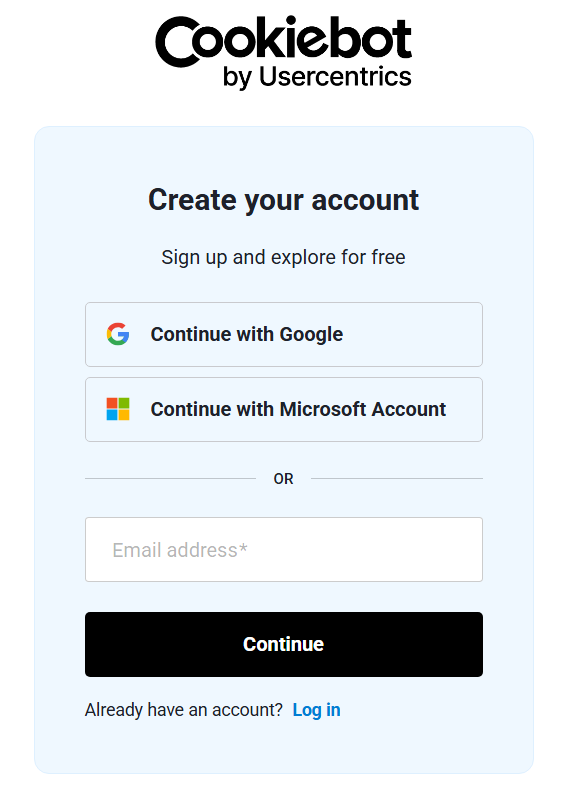
On the sign-up page, you can create your account using:
-
your email address
-
Google account
-
Microsoft account
Enter your email and click “Continue”, then create your password.
Cookiebot offers a free trial, so you don’t need to enter payment details at this stage.
If you want to understand how pricing works and what affects the cost, read our guide
Cookiebot Pricing Explained: How Much Does Cookiebot Cost in?
Step 3 — Verify Your Email
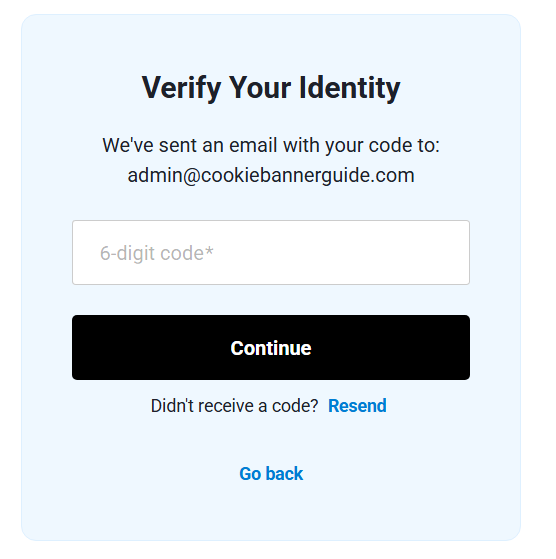
After signing up, Cookiebot will send you a verification code via email.
-
open your email
-
copy the code
-
paste it into the verification field
Click “Continue” to confirm your account.
Step 4 — Complete Your Account Setup
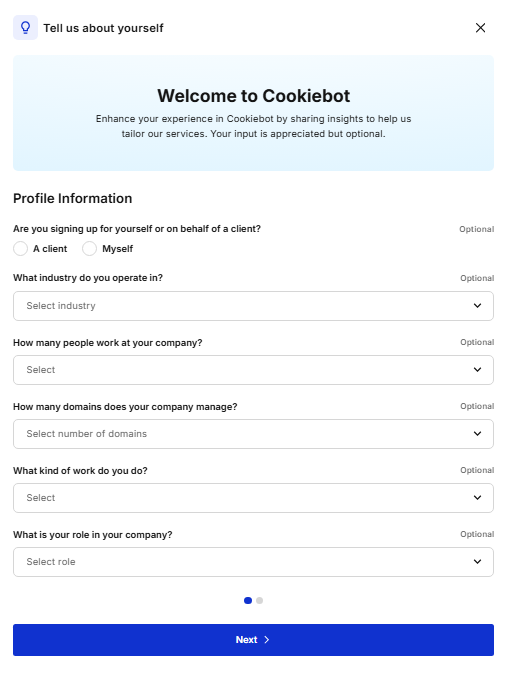
You may be asked to provide some basic information, such as:
-
whether you’re signing up for yourself or a client
-
your industry
-
company size
These fields are optional, so you can skip or fill them in.
Click “Next” to continue.
Step 5 — Add Your Website Domain
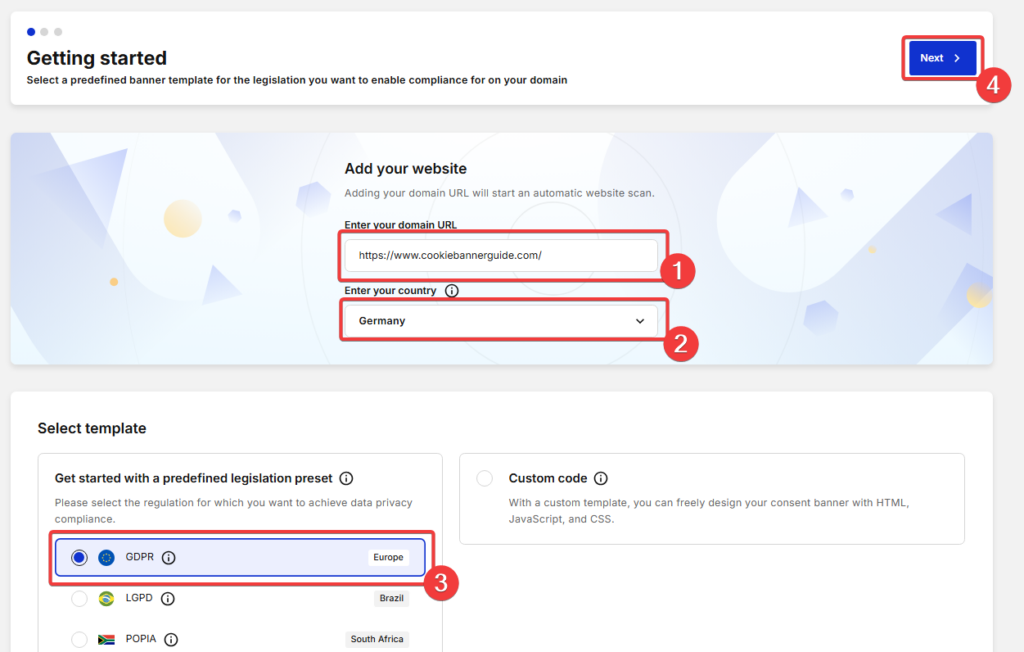
Now it’s time to connect your website.
-
enter your website URL
-
select your country
-
choose a regulation preset (e.g. GDPR for EU)
For most websites targeting Europe, GDPR is the correct choice.
Click “Next” to continue.
Step 6 — Configure Basic Banner Settings
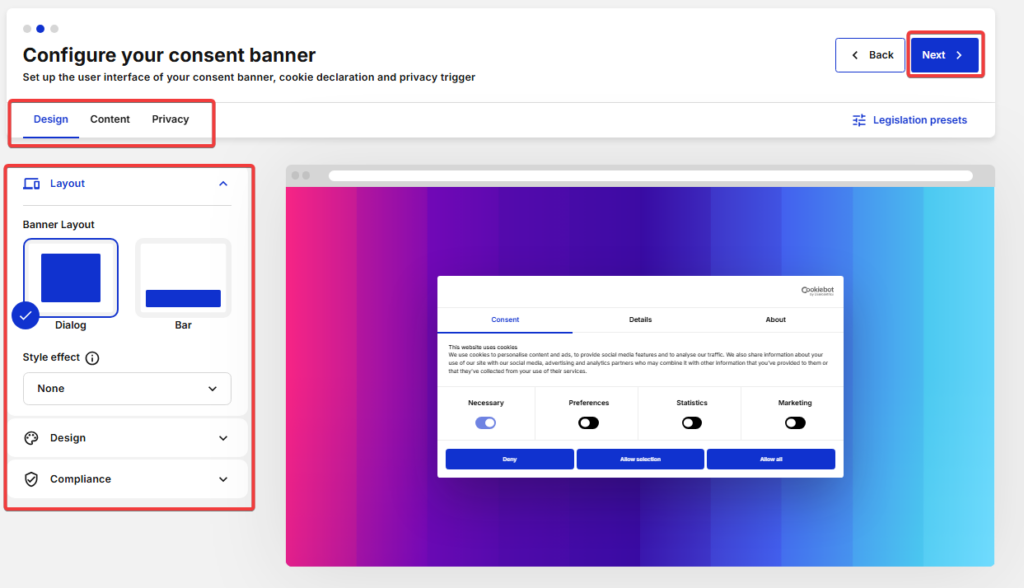
Cookiebot will guide you through basic banner setup.
Here you can:
-
choose banner layout
-
adjust design
-
review content and privacy settings
These settings define how your cookie banner will appear and behave on your website.
Don’t worry too much about perfection — you can change everything later.
Click “Next” when you’re ready.
Step 7 — Finish Setup and View Implementation Options
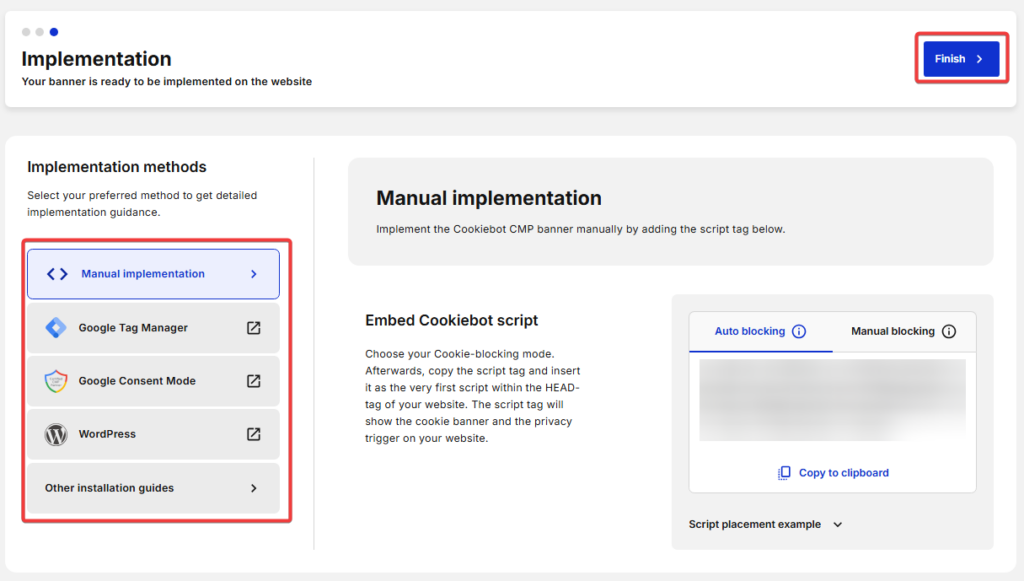
Once setup is complete, you’ll see different ways to install Cookiebot:
-
manual script
-
Google Tag Manager
-
WordPress plugin
This is where you connect Cookiebot to your website.
Step 8 — View Your Domain and Start Scan
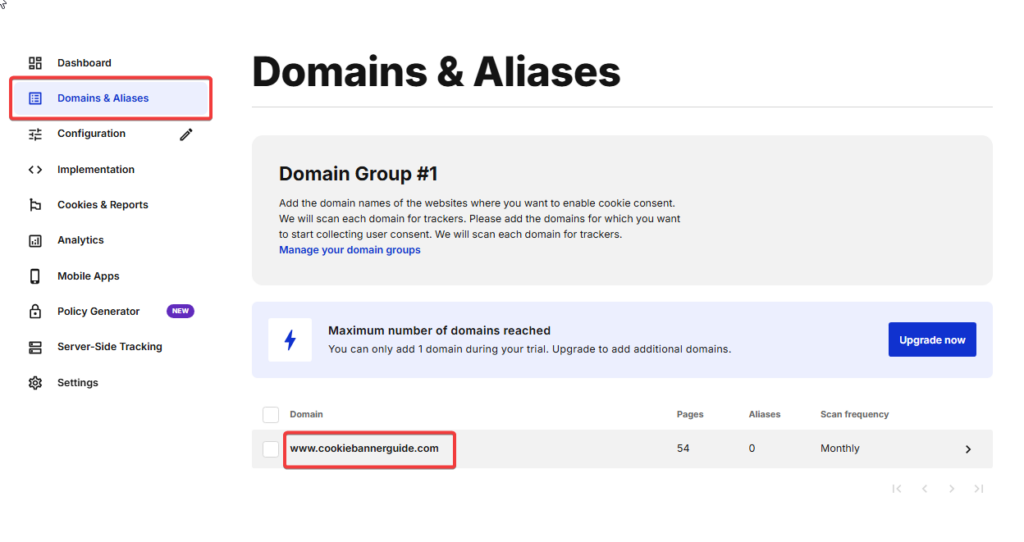
After setup, your domain will appear in your dashboard.
Here you can:
-
view your domain
-
manage settings
-
start a cookie scan
Click “Start domain scan” to begin scanning your website for cookies.
Creating a Cookiebot account is only the first step.
Your cookie banner will not work properly until:
• Cookiebot is installed on your website
• your domain has been scanned
• your scripts are properly blocked before consent
Summary
Creating a Cookiebot account is quick and beginner-friendly.
You simply:
-
sign up
-
verify your email
-
add your website
-
complete basic setup
Once your account is set up, you’re ready to install Cookiebot on your website and activate your cookie consent banner.
📘 Next Step: Install Cookiebot on WordPress
Now that your Cookiebot account is ready, the next step is to install Cookiebot on your WordPress website.
This will connect your site to Cookiebot, activate your consent setup, and prepare your website for cookie scanning and banner configuration.

Frequently Asked Questions
Common questions about this topic
Cookiebot offers a free trial. After that, pricing depends on the number of pages on your website.
No. You can create an account and test the platform without entering payment information.
Can I add multiple websites?
You’ll need to install Cookiebot on your website and run a scan before the banner becomes active.
Not necessarily. WordPress users can use a plugin, while others can use simple script installation.